

 All Rights Reserved.


十年之约通过啦🎉!🎉
本文为在 Fuwari 博客添加评论功能的教程,基于相关参考教程做优化与美化,涵盖创建评论组件、配置全局参数、在文章页接入评论框、添加评论样式、添加表情包等步骤,还介绍在 “关于我” 页面添加评论的拓展方法。
📖 参考:给你的 Fuwari 接入 Twikoo 评论 - 咸鱼小窝
我基于上面的教程做了一些优化与美化,主要包括:
---import type { CollectionEntry } from 'astro:content'import { commentConfig } from '@/config'import Twikoo from './Twikoo.astro'
interface Props { post: CollectionEntry<'posts'>}
const { slug } = Astro.props.postconst path = `/posts/${slug}`const url = `${Astro.site?.href}${path}`
let commentService = ''if (commentConfig?.twikoo) { commentService = 'twikoo'}---
<div class="card-base p-6 mb-4 text-black dark:text-white"> {commentService === 'twikoo' && <Twikoo path={path} />}</div>
---import { commentConfig } from '@/config'
interface Props { path: string}
const config = { ...commentConfig.twikoo, el: '#tcomment', path: Astro.props.path,}---
<div id="tcomment"></div>
<script is:inline define:vars={{ config }}> window.__twikooConfig = config;</script>
<script is:inline src="https://api.kekesxk.online/public/js/twikoo.all.min.js" onload="twikoo.init(window.__twikooConfig)"></script>大约第 74 行添加:
export type CommentConfig = { twikoo?: TwikooConfig}
type TwikooConfig = { envId: string region?: string lang?: string}1.顶部引入类型:
import type { LicenseConfig, NavBarConfig, ProfileConfig, SiteConfig, CommentConfig,} from './types/config'2.最底部添加配置:
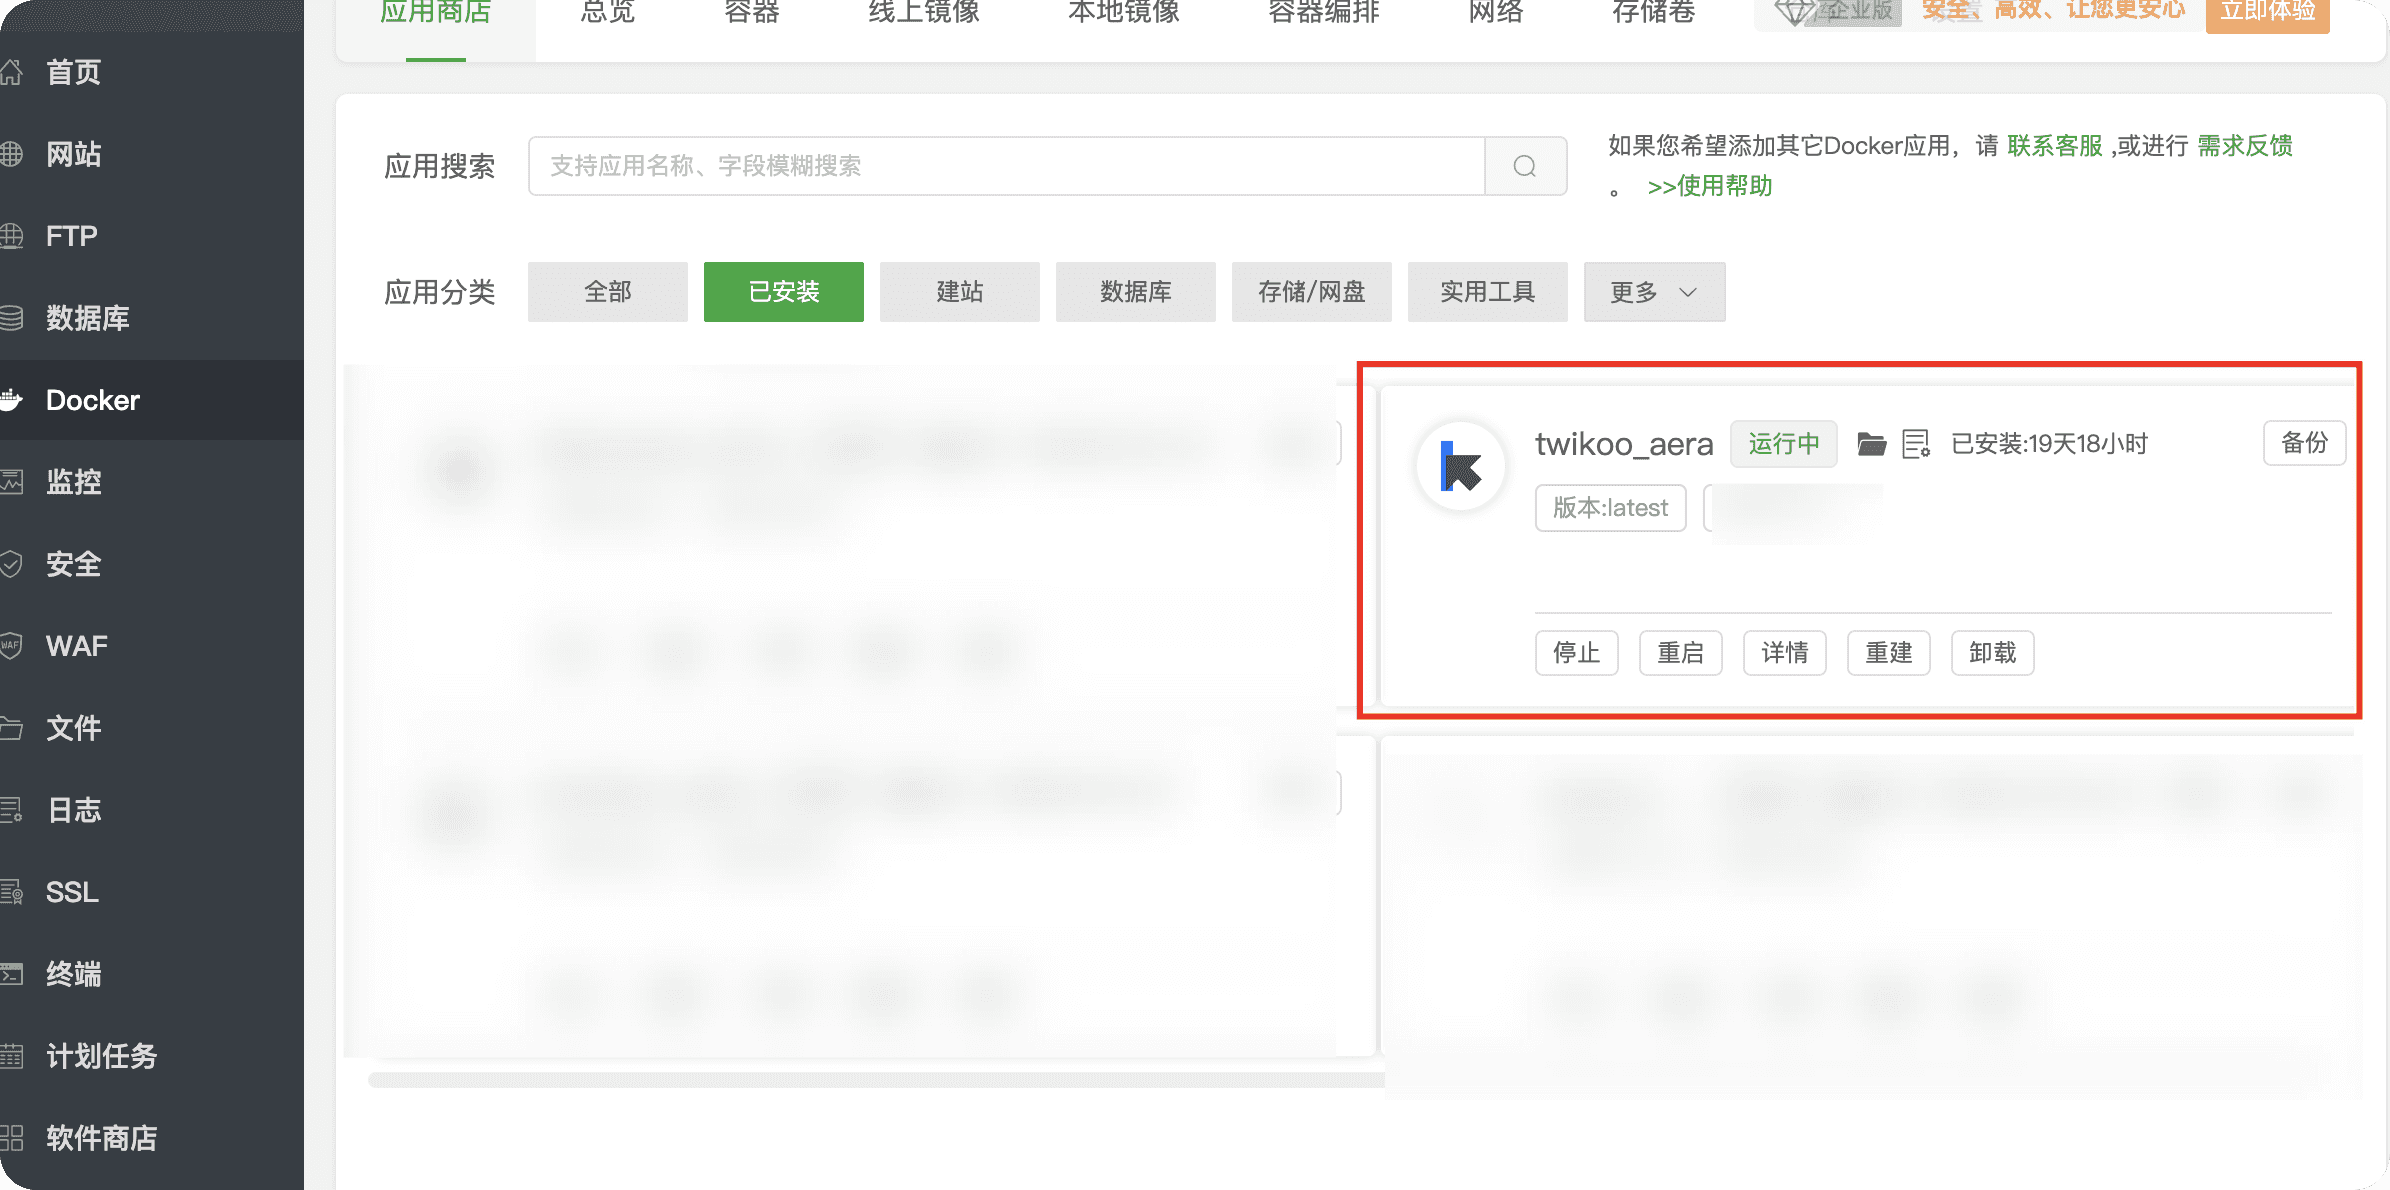
export const commentConfig: CommentConfig = { twikoo: { envId: '你的 EnvID 替换在这里', },}📌 envId 是你的 Twikoo 后端地址,例如通过宝塔 + Docker 部署。
1.约 16 行引入组件:
import Comment from "@components/comment/index.astro"2.在页面底部添加:
<Comment post={entry}></Comment>创建样式文件 src/styles/twikoo.css,可结合 TailwindCSS 使用,支持暗黑模式、按钮动画、评论气泡样式等。
:root { --tk-text: black; --tk-border: rgba(144,147,153,0.2); --tk-border-hover: rgba(144,147,153,0.4); --tk-bg-light: #f9fafb;}
html.dark { --tk-text: #d1d5db;}
.tk-comments { @apply text-[var(--tk-text)];}
.tk-submit { .tk-avatar { @apply hidden transition-opacity duration-300; }}
/* Text Area */.tk-row { .tk-col { @apply flex-col-reverse; .tk-input { textarea { @apply rounded-[var(--radius-large)] py-4 px-6 !min-h-[150px] focus:border-[var(--primary)] focus:shadow-md transition-all; } } }}
.el-input { @apply !rounded-lg;}
.tk-meta-input { @apply min-h-10 relative mt-3; .el-input-group__prepend { @apply !bg-inherit; } div { @apply py-1 rounded-l-lg; min-height: inherit; } input { @apply px-4 rounded-r-lg focus:!border-[var(--primary)]; min-height: inherit; }}
/* Button */.tk-row.actions { @apply w-full !ml-0 !mt-0; .__markdown { @apply !hidden; } .tk-preview, .tk-send, .tk-cancel { @apply border-none rounded-lg px-3 py-0 h-8 !bg-[var(--btn-regular-bg-active)] disabled:!bg-[var(--btn-regular-bg)] !text-[var(--btn-content)] disabled:!text-[#ffffffa1] hover:opacity-90 active:scale-95 transition-all duration-200; }}
/* Comment title */.tk-comments-title { .__comments svg { @apply fill-[var(--primary)]; }}
.tk-comment { @apply border rounded-2xl p-4 shadow-sm hover:shadow-md transition-shadow duration-200 bg-[var(--tk-bg-light)] dark:bg-[var(--page-bg)]; border-color: var(--tk-border); .tk-action-icon svg { @apply fill-[var(--primary)]; }}
.tk-action { .tk-action-count { @apply text-[var(--btn-content)]; }}
.tk-meta { .tk-tag { @apply border-none rounded-lg text-[var(--btn-content)]; }
.tk-tag-green { @apply bg-[var(--btn-regular-bg)] dark:bg-[var(--primary)] dark:text-[var(--deep-text)]; }}
.tk-content,.tk-preview-container { a { @apply link underline underline-offset-4 decoration-[1.5px] hover:opacity-80 transition-opacity text-[var(--primary)] font-medium; }
.tk-ruser { @apply no-underline; }
:not(pre) > code { @apply bg-[var(--inline-code-bg)] rounded-md text-[--inline-code-color] px-1 py-0.5 font-semibold; }
li{ @apply before:content-['•'] before:text-[var(--primary)]; }}
/* Replies */.tk-replies { .tk-comment { @apply bg-[var(--tk-bg-light)] dark:bg-[var(--page-bg)] border border-[var(--tk-border)]; .tk-content { > span:first-of-type { @apply text-xs; } } }}
.twikoo .code-block { pre { @apply !rounded-xl shadow-inner bg-[var(--page-bg)] text-sm; }
.copy-btn-icon { width: inherit !important; height: inherit !important; }}
.tk-expand-wrap .tk-expand,.tk-collapse-wrap .tk-expand { @apply hover:rounded-lg mt-1 hover:bg-[var(--btn-plain-bg-hover)] transition-all duration-200;}到此,评论系统 已经引入完成
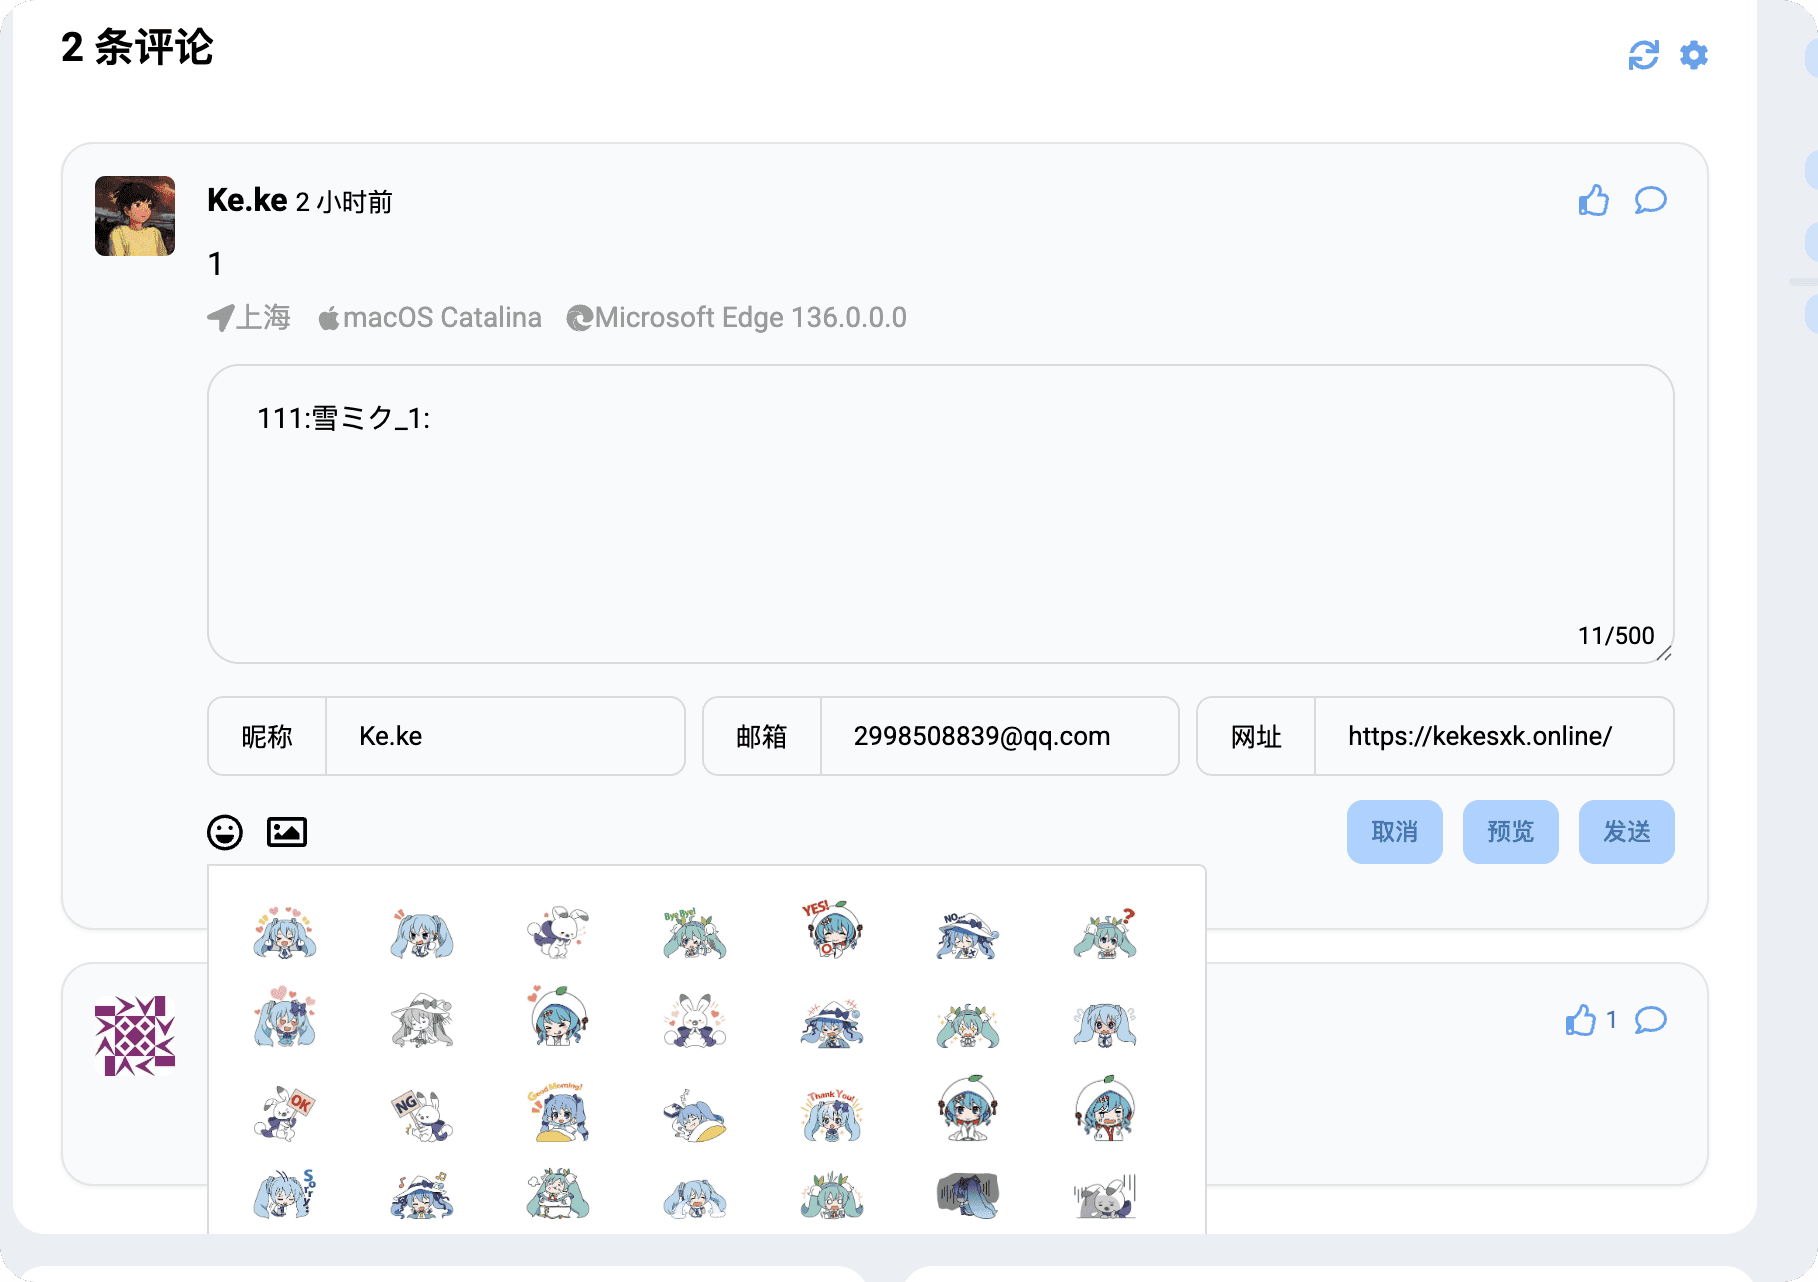
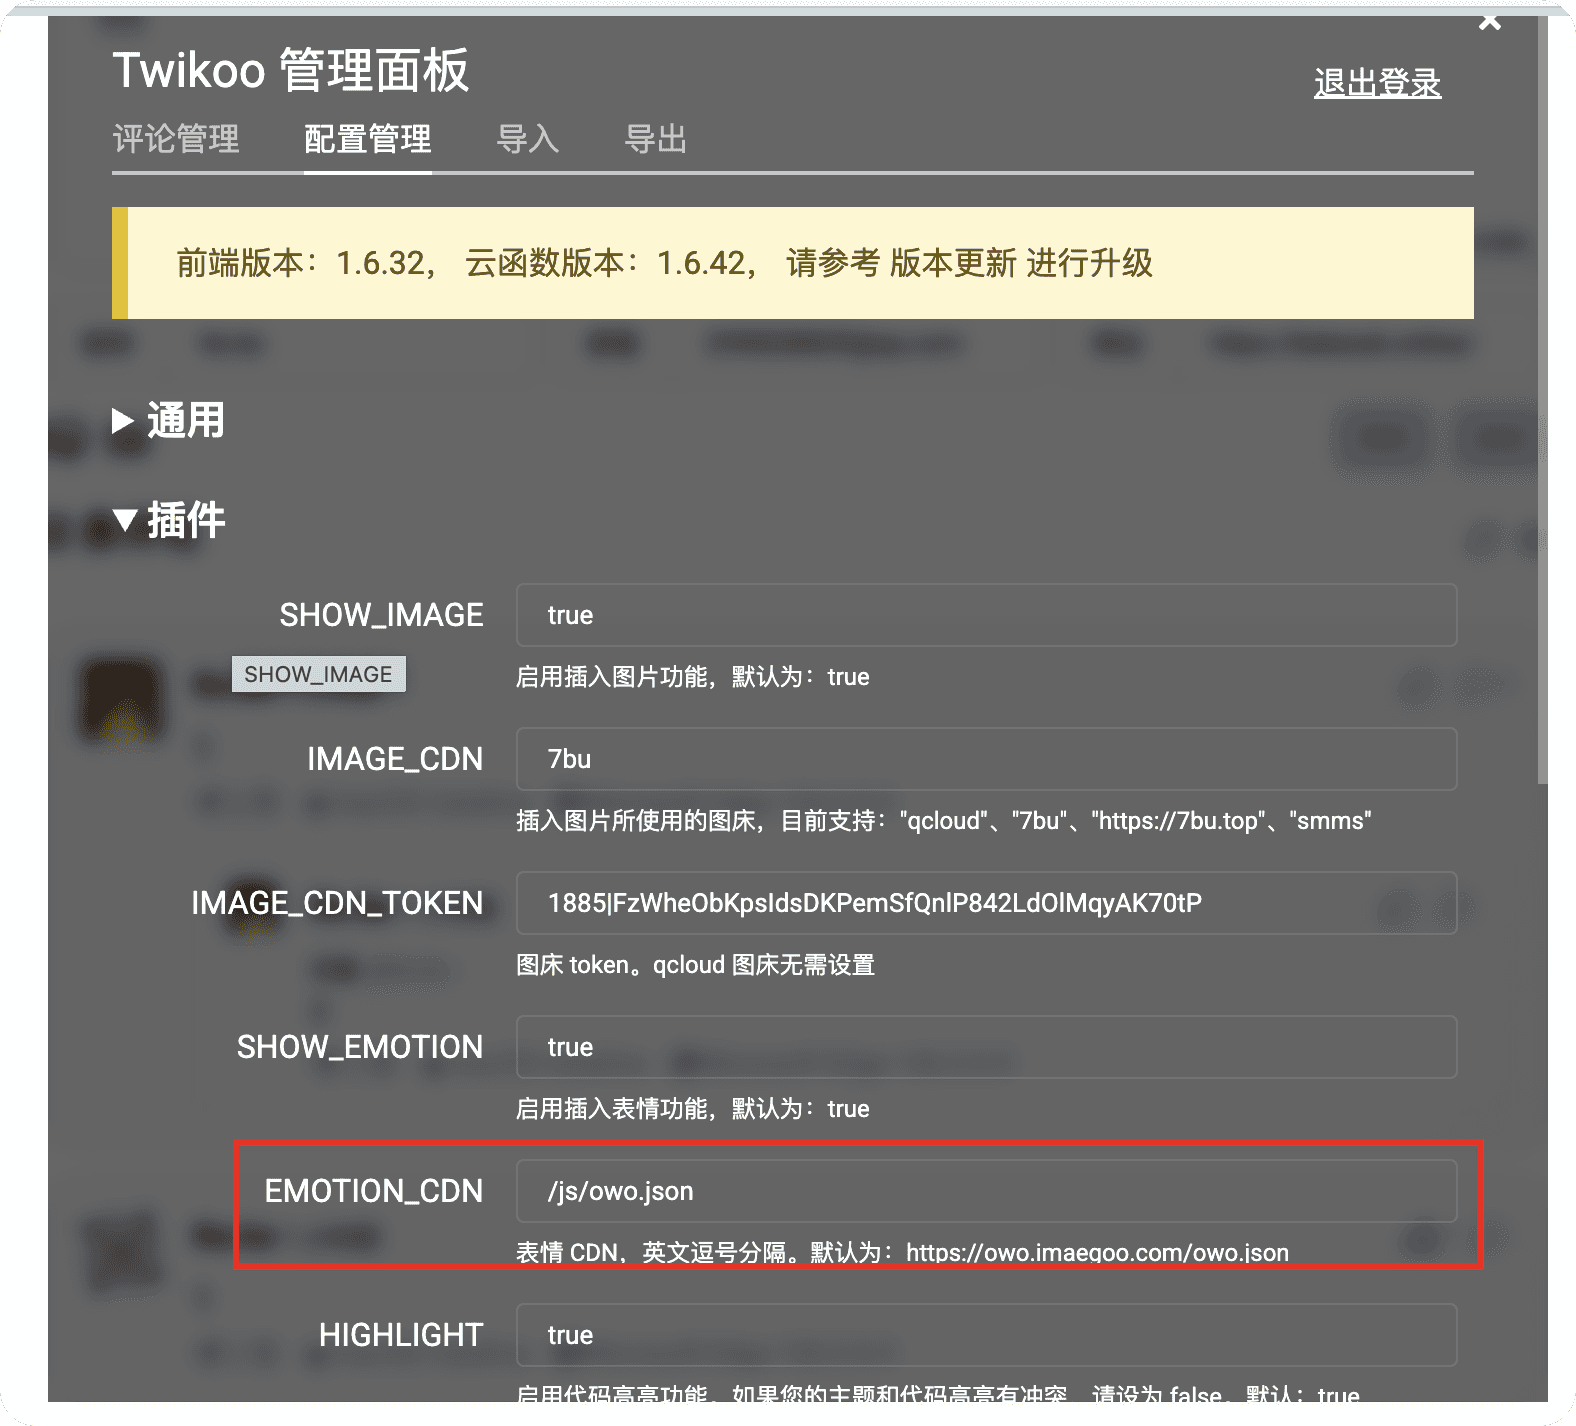
这里给出我收集到的的 owo.json,将其放入 /public/js引入即刻,可根据需求自由配置
点击评论右边的设置,配置 emotion_cdn
即使不是文章页,只要模拟一个 fakePost 即可!
📝 只要保证 slug 和 id 唯一,就可以在任意页面引入评论!
---import MainGridLayout from "../layouts/MainGridLayout.astro";import { getEntry, CollectionEntry, render } from "astro:content";import Markdown from "@components/misc/Markdown.astro";import Comments from "@components/comment/index.astro";
const aboutPost = await getEntry("spec", "about");if (!aboutPost) throw new Error("About page content not found");
const fakePost = { ...aboutPost, slug: 'about', id: 'about', data: { ...aboutPost.data, title: '关于我', description: '这是关于页面的评论入口', published: new Date(), draft: false, }} as unknown as CollectionEntry<'posts'>;
const { Content } = await render(aboutPost);---<MainGridLayout title="关于我"> <div class="card-base z-10 px-9 py-6 relative w-full"> <Markdown class="mt-2"> <Content /> </Markdown> </div>
<!-- 评论 --> <div class="card-base z-10 px-9 py-6 mt-6 w-full"> <Comments post={fakePost} /> </div></MainGridLayout>-| -| -| -

来点音乐吗...